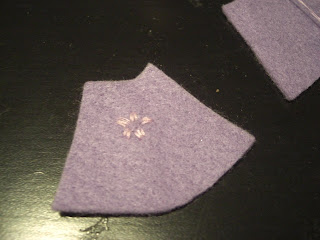
First, cut out the shape of the body, twice.
Next, whip stitch the pieces together. Here's a video for whip stitching.
Cut out an oval (about the size of the bottom opening of the body) from a scrap piece(it could actually be any color felt).


Fill the body with poly fill. A pencil helps to stuff it in there.
After you've stuffed it, sew the oval onto the bottom.
I embroidered a little flower, but you can skip this step.
While holding the dress to the doll, whip stitch it.
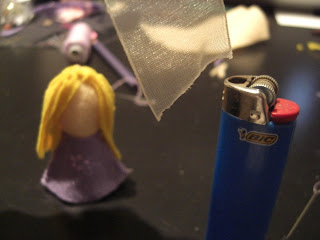
I decided to do the hair differently from my first fairy. The first fairy was modeled after the felt puppets I made for Bear ages ago. This fairy became it's own creation. I just cut scraps into little strips, length didn't matter too much. Then I stitched the scraps onto the head. Once I felt I had enough scraps on the head, I gave the fairy a haircut.
I used a ribbon for the wings. I don't know what this kind of ribbon is called - this is from my stash of saved ribbons from tops of presents. If your ribbon is thinner, you can make two ribbon loops (as in the next picture) and make wings more like the first fairy's wings.
Use a lighter to seal the raw edge of the ribbon.
Make a ribbon loop. Make sure you seal the other raw edge.
Gather the middle of the ribbon together by sewing it.
Attach to fairy with a few stitches, then draw a face with a Sharpie, if you want.
If you want a fairy house for your fairy, check out Valerie's awesome tutorial.


Impressed by your haircutting skills. I could use a trim. How much do you charge? :)
ReplyDeleteVery cute project. I love Valerie's blog too. I'm hoping to get some felt for or after Christmas so I can do some of this type of thing, or felt food, or felt activity boards where you dress a figure, etc.
Oh my goodness, I love this and I know Maddie would go bananas for it! Thank you for posting this. I feel a project coming on... :)
ReplyDeleteI was just thinking "Neat! A fairy to go with the fairy house!"
ReplyDeleteCute fairy! Have you made any fairy fingerpuppets by leaving the bottom open instead of stuffing?
ReplyDeleteSo cute!!!!!
ReplyDeleteThanks for this tutorial, followed yours and Valerie's and created this http://www.flickr.com/photos/iwannabcreative/4291439410/
ReplyDelete