Here is how I will tutor the drawing portion of the class with the five year olds.
Week 1:
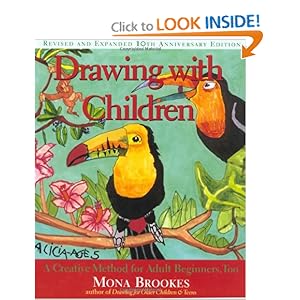
Have students make their own OiLS chart by folding paper into 6 squares and using the fold lines as guides for 6 boxes. All the information about OiLS is in the Mona Brooks book, Drawing With Children
Part 2: Have the students practice copying patterns using the 5 elements of shape using Dona Young's worksheets.
Use Ed Emberley's Drawing Book of Animals and lead students through the drawing of several animals. I want to emphasize with my students how they can use the elements to add detail and texture, as in Ed Emberley's sheep, dog, and one of the fish, but we'll do some others if time allows.
Project:
Draw an owl as at Art Lesson For Kids.
Week 2: (Mirror Images)
(Most of week 2's plans are straight from Half-a-hundred-acre Wood)
Part 1:
Fold a sheet of paper in half. Cut out shapes on the fold. Try to guess what the mirror image will look like and then open it!
Part 2
Students come up to the whiteboard one at a time to finish a mirror image I've drawn there (see photo at the above Half-a-Hundred Acre Wood link). I'll keep adding components to the drawing for the students.
Draw the other half of a leaf.
Students work on the Donna Young Mirror Image worksheets.
These Andy Warhol-inspired mirror image autumn leaves will be a fantastic project for this week. Although, these contour line leaves are pretty too, I think the 5-year-olds in my class will have more success with the first project.
Part 1:
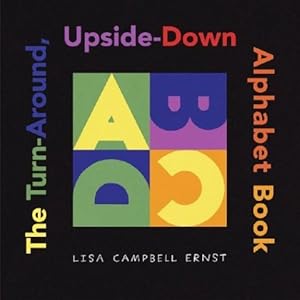
Look at the book The Turn-Around, Upside-Down Alphabet Book
Students write their names on a piece of paper, turn it upside down and try to rewrite their name upside down by focusing on OiLS.
Part 2:
Take owl drawing from last week, turn it upside down and draw it from this new perspective. They won't color it (see week 4 as to why).
Week 4: (Abstract Art)
Part 1:
Bring in samples of abstract art of various genres (cubism, neoplasticism, expressionism, fauvism, abstract expressionism (I'm thinking big names like Kandinsky, Warhol, Picasso, Rousseau....) Discuss these with the students and that the main part of abstract art (for simplicity for these 5 year olds) is that artists simplify or exaggerate and use color/shape to express emotion.
Part 2:
See my pin to see the warm up project which we will do with circles (think plastic lids as templates) instead of triangles.
Project:
I like this project of drawing a hand and making it pop out, but I haven't decided for certain if this is the project we'll do. I'm also thinking we could do this or this to the upside down owl drawing from the week before. I've done the second project as a Picasso project with third graders and it turned out really nice. I think the first one will be easier for fives.
Week 5: (Perspective)
Part 1:
Show the illustrations in Rome Antic - there are so many in there that show one-point perspective.
Part 2:
Practice turning planes (squares, rectangles, and triangles) into 3-dimensional figures. These students will have done this last year in my class. Show how shading also adds depth and the perception of perspective.
Use the cylinders and boxes, pyramids and prisms we just drew to make a more complex drawing (for example a castle with turrets). I will be demonstrating on the board.
Project:
Love this perspective art project of a road with a city in the skyline. It will be simple for the five year olds, but just be that much nicer than the road lined with trees we did last year.
Week 6: (final project)
Part 1:
We will look back at their drawing "portfolios" (what I've kept all 5 weeks of what they have done in class) and discuss/review things we've learned.
Project:
I want them to own this project, not for me to dictate what to draw as in the previous projects, so I'm offering criteria and plenty of "how to draw" books (I also have What to Draw and How to Draw it on my i Pad, which I will bring to class that day) and asking them to just spend the class drawing.
Criteria:
1. use OiLS to help break down what it is you want to draw
2. include perspective (this could mean adding a bit of shading to make something look rounder, or more 3-D)
3. fill the page and add background
4. Put in your best effort
Now off to plan Tin Whistle, my least favorite 6 weeks...
.jpg )


Hi there! I just found your blog today. I am new to tutoring for CC and I just want to thank you for setting up your blog. it's really amazing and so very helpful for someone new to tutoring. I am trying to figure out how I am going to set up my lesson plan for the beginning...do you happen to have a sample lesson plan(s) in how you go about teaching the various subjects? I ask because I'm new at this and I'm still trying to figure out how to go about this. I'm feeling a bit overwhelmed. If you could be of some assistance I would greatly appreciate it. I just subscribed to your blog. THanks again!
ReplyDeleteI wish Anna could be in your art class - it sounds wonderful. This is one thing that makes me unhappy about her public school - they managed to keep their music program (once every two weeks), but art is now a once-a-month program led by parent volunteers. Sad!
ReplyDeleteGreat plans! Pinning you post now! Thank you for planning to include in the CC Blog Carnival! Blessings!
ReplyDeleteBrandy at Half-a-Hundred Acre Wood
Raising a Happy Child. That is so sad about the art being once a month. Art should be at least once a week!
ReplyDelete@ Brandy- thanks for pinning! Your blog is so inspiring!
@The Park Family - I would be happy to do a blog post this week with sample tutor plans. Have you been to a tutor training yet? They do give lots of tips and ideas there. But it does help to see those tips and ideas come together cohesively.
Hi there! I am LOVING these posts, thank you. I will also be tutoring abecedarians this year, so this will be super-helpful. Question, since you've done this before -- do you really have time for something like the "owl" project even in Week 1? Everyone's telling me to keep it simple, but I LOVE these ideas and think it would be fun for the kids to do. Please let me know -- are these what you will actually do in class or if maybe these are ideas more for home?
ReplyDelete@Michelle, Yes, these are plans that I WILL use in class! Last year, I completely underplanned the art portion and I felt like there was a lot of wasted time. Week 1, especially, has lots of extra time to it, because there is nothing yet to review. They may not have time to color it in. If they don't, maybe there will be extra time during another week. I would rather have too much planned and not get to a project, than plan too little, as happened last year. I didn't like the feeling of being faced with 4 year olds who were done and by done I mean, done with being there with me (we had art LAST last year and the poor 4 year olds were so tired of having been there 3 hours that they just wanted to be back home playing). My hope is that having "big" directed projects will hold the now 5-yr-olds' attention better.
ReplyDeleteI think I should already know this but what does it mean OiLS?
ReplyDelete@Sharing Christ. It isn't obvious, so thank you for asking - O is for circles, the i is for straight lines and dots, the L (Upper case) is for angled lines, and the S is for curved lines. These things are the basic elements of any drawing. A circle can be any rounded shape as long as it isn't filled in, and the dot can be small or large - it is circles but filled in.
ReplyDeleteHope that helps!
Thank you. This helped a lot.
ReplyDeleteSo appreciative of you sharing your plans! This will be my first year as a tutor and I have found all your posts immensely helpful!
ReplyDelete